ManageEngine Analytics Plus
ManageEngine Analytics Plus is a robust self-service business intelligence, data analytics, and online reporting platform that offers a comprehensive glance at your key business metrics, such as reports, rich text formats, images, and KPI widgets. Using Analytics Plus, you can obtain a bird's-eye view of your organization's performance across departments by amalgamating data from varied sources.
By integrating Site24x7 with Analytics Plus, you can gain a complete overview of your business and IT-related information from the exhaustive business intelligence reports and dashboards, all on a single platform. The data obtained can be used to correlate and make better data-driven business decisions.
How to integrate from Site24x7
- Log in to Site24x7.
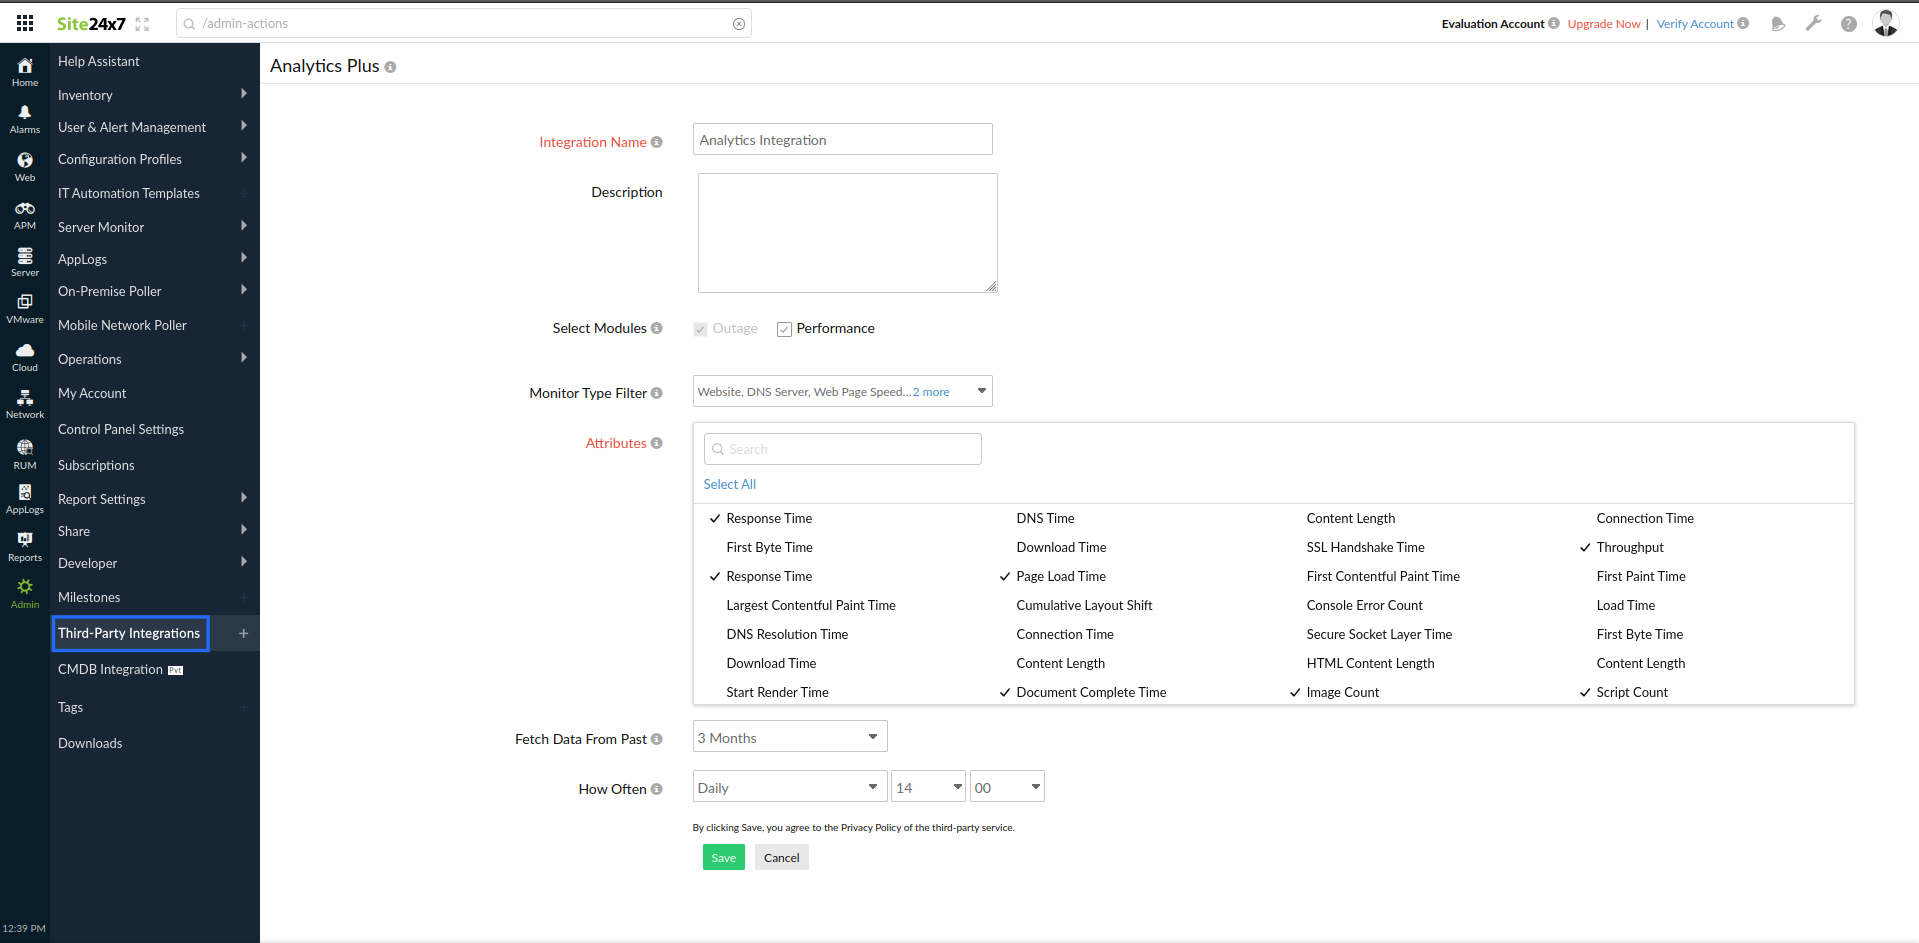
- Navigate to Admin > Third-party Integration > Analytics Plus.
- Integration Name: Provide a name for the integration. The Integration Name will become the Workspace Name in Analytics Plus.
- Description: Provide a description of the integration.
- Select Modules:How to integrate from Analytics Plus
- Downtime: By enabling the Downtime checkbox, you can sync outage data and incident data from your Site24x7 monitors with Analytics Plus.
- Performance: By selecting the Performance checkbox, you can sync selected performance attributes from your Site24x7 monitors with Analytics Plus.
Note: Only the daily average data will be sent to Analytics Plus.
- Monitor Type Filter: Choose the monitor type from the drop-down list, of which the attributes will be listed.
- Attributes: If the Performance checkbox is selected, you will be provided with an option to select the Performance Attributes related to a monitor type.
- Fetch Data From Past: Choose a time period up to which you would prefer data to be synced from Site24x7. You have three options: three months, six months, and 12 months.
- How Often: Choose a frequency for syncing data from Site24x7 with Analytics Plus by selecting:
- Daily: If you choose this option, data from Site24x7 will be synced daily; once a day.
- Hourly: If you choose this option, data from Site24x7 will be synced on an hourly basis.
- Not Scheduled: If you choose this option, data will not be synced.
- Click Save to save the integration.
How to integrate from Analytics Plus
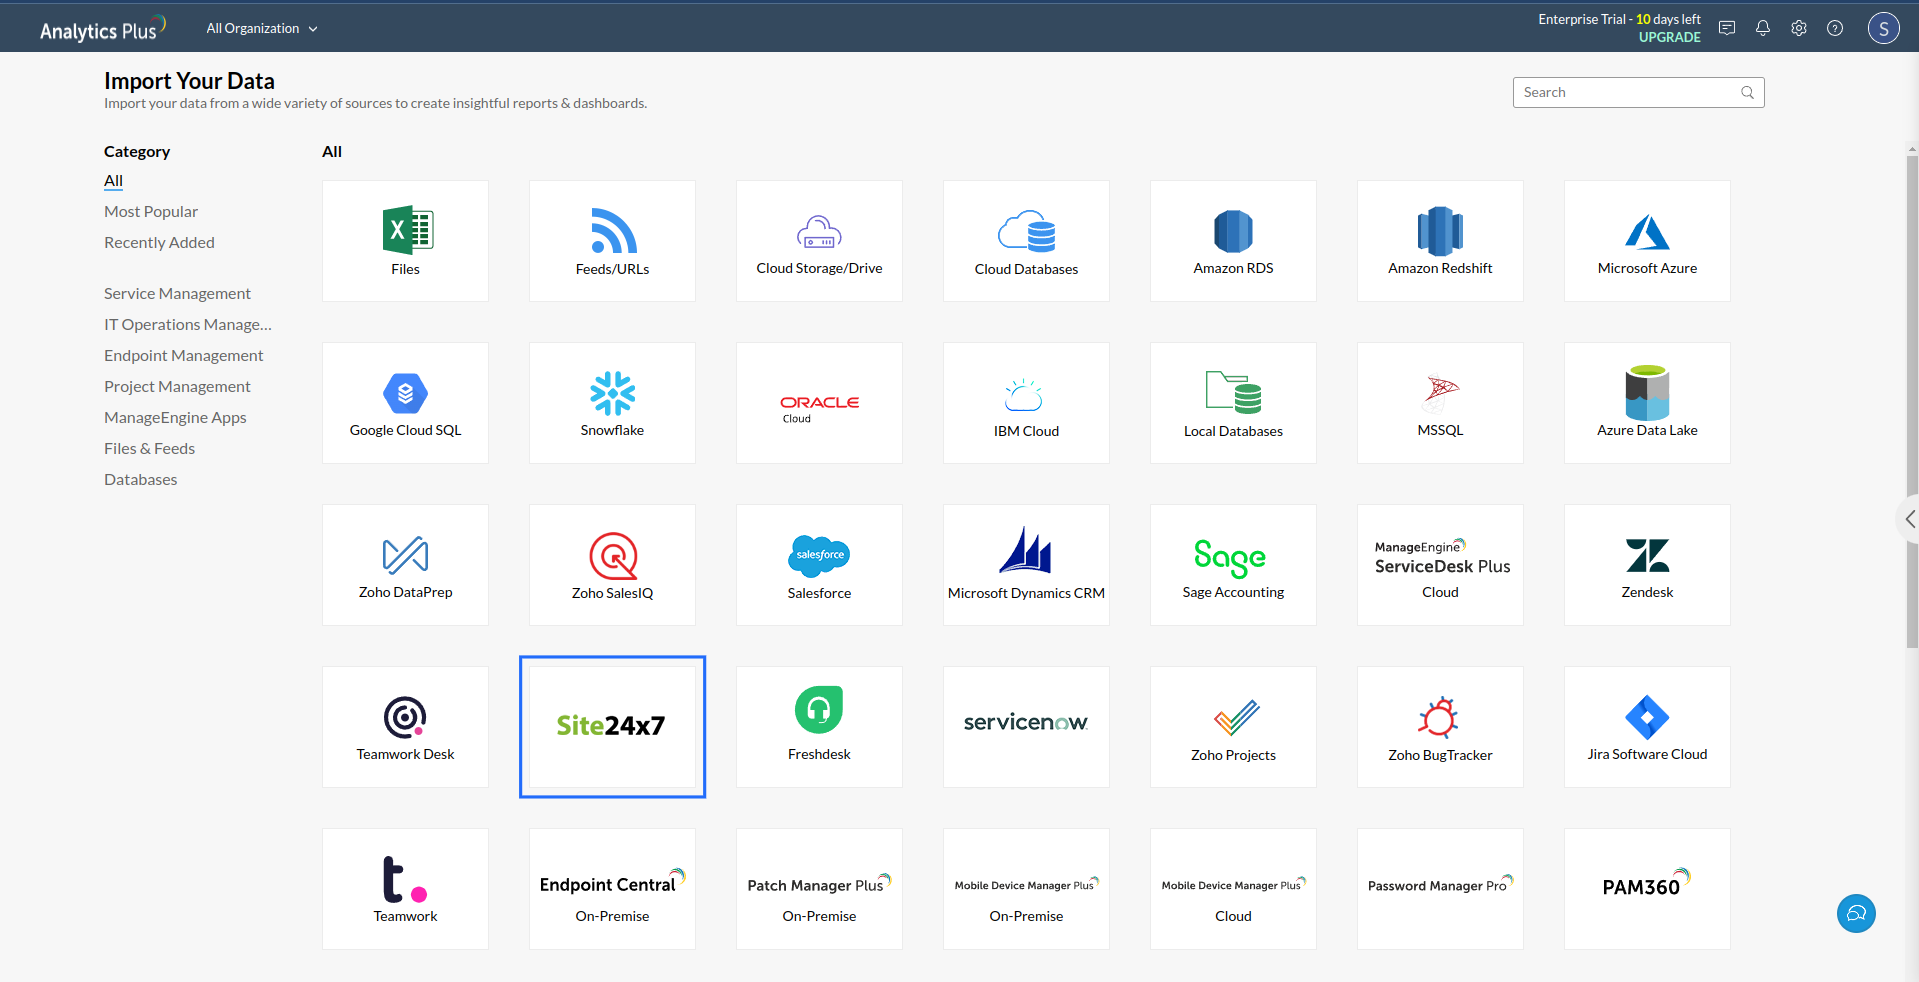
- To initiate the integration from Analytics Plus, click the Import Your Data button located on the home page.

- Choose Site24x7 from the list.
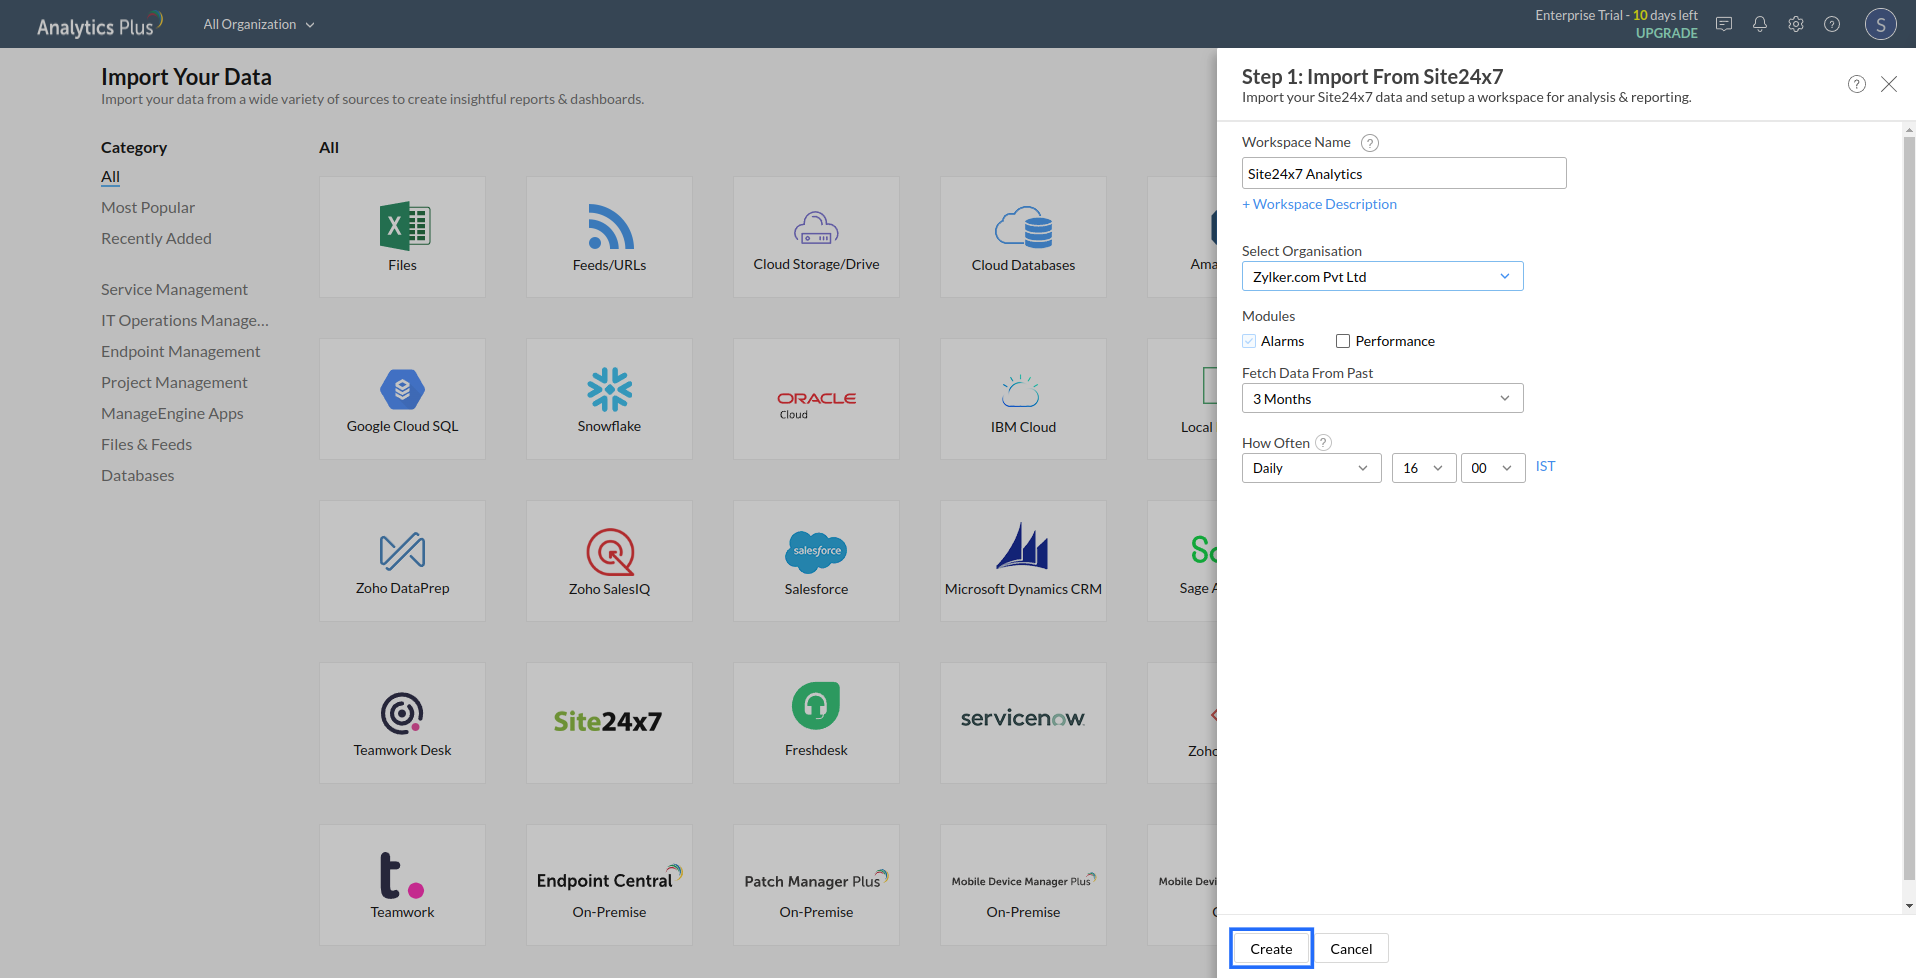
- In the pop-up window that appears, provide the following details to import data from Site24x7:
- Workspace Name: Provide a name for the Workspace. It should be the same as the Integration Name.
- Select Organization: Provide the organization you want to associate the integration with.
- Monitor: Choose the monitor type, which is the data you want to sync with Analytics Plus.
Note: In Site24x7, a monitor is any resource whose performance should be tracked. It can be a website, a server, a network device, or an application. Based on your monitoring needs, the monitor types can be different. Read more about monitors.
- Attributes: Choose the specific Attributes related to each monitor type for which the reports have to be generated.
- Fetch Data From Past: Choose a time period up to which you want data to be synced from Site24x7. You have three options: three months, six months, and 12 months.
- How Often: Choose a frequency for syncing data from Site24x7 with Analytics Plus.
- Click the Create button to start the integration from Analytics Plus.
View analytics in Site24x7
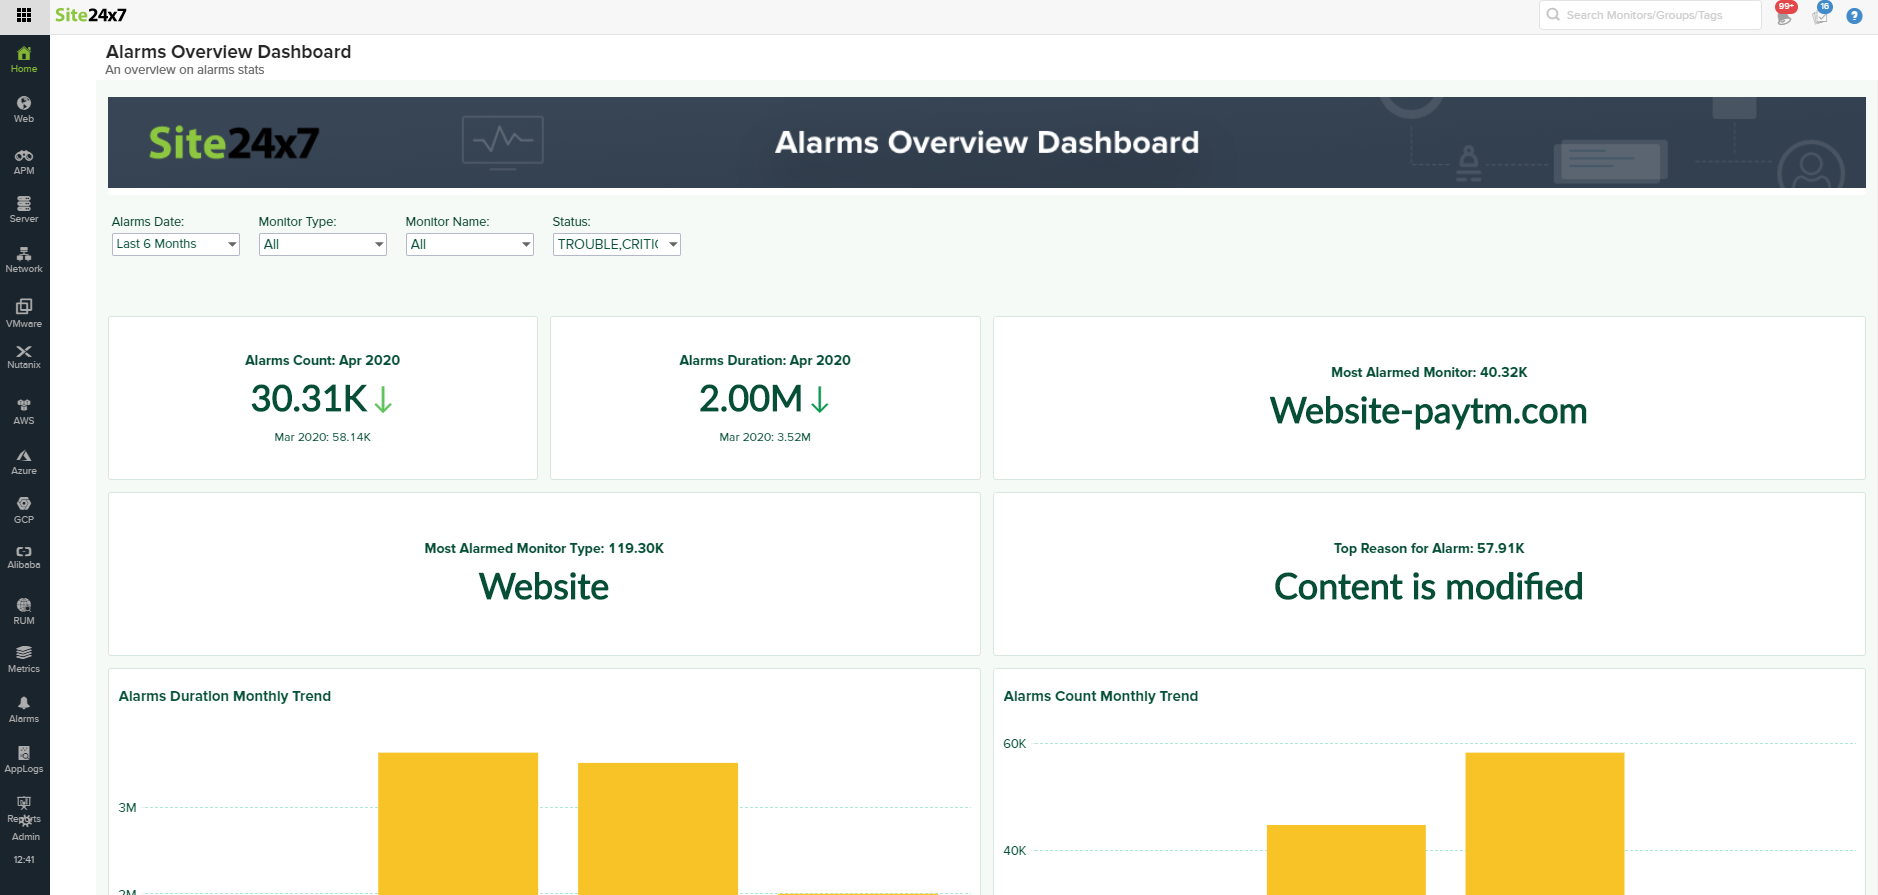
In Site24x7, analytics can be viewed in the Reports tab. To view analytics in Reports:
- Log in to Site24x7.
- Navigate to Reports > Advanced Analytics.
- In the new Advanced Analytics page that opens, click the reports of your choice to view them. You can also apply various filters on this page.
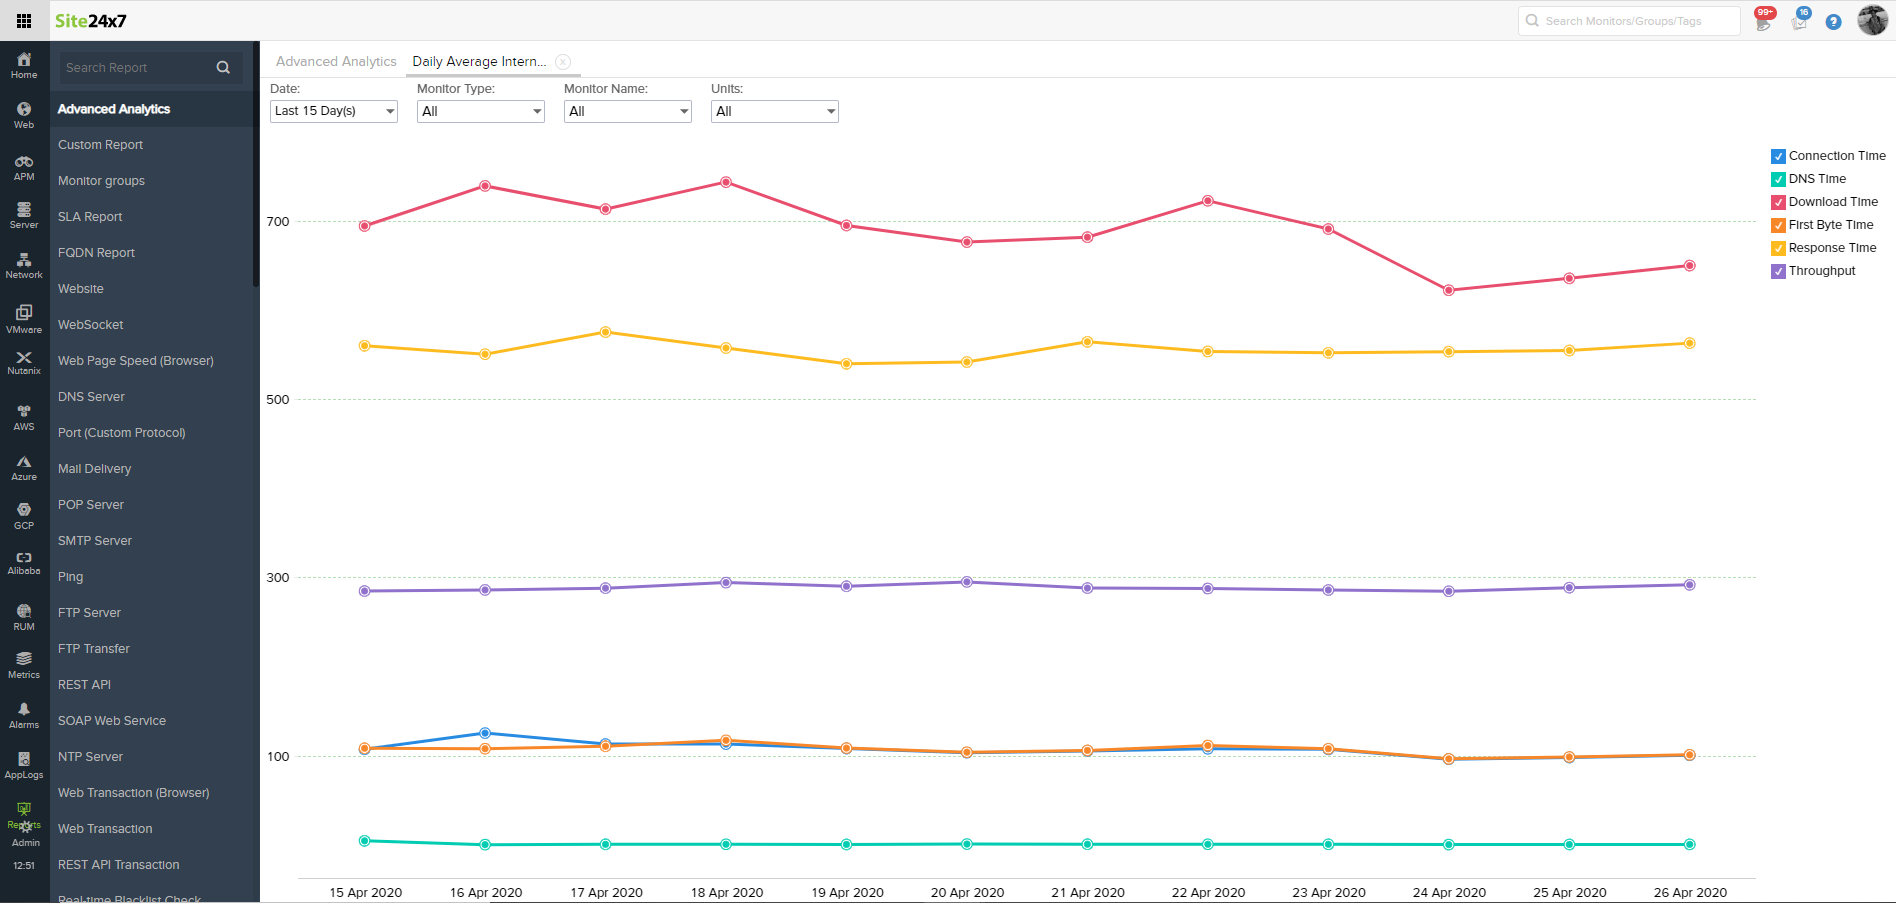
To add an analytics widget in Custom Dashboards:
- Navigate to Home > Dashboards > Custom Dashboards.
- Click Create New to add a new widget.
- In the new Add Widgets page that opens, choose Advanced Analytics in the Widget category. All the reports you have created in Advanced Analytics will be listed on this page. You can then drag and drop the reports of your preference, and click Done Customizing to save your changes.
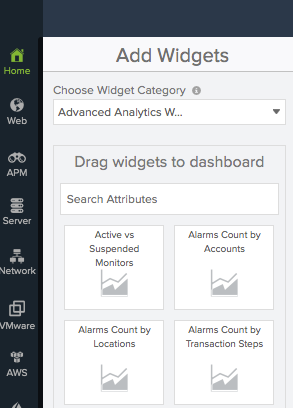
Under Custom Dashboards, you can customize by adding all the widgets of your choice along with an Advanced Analytics widget.
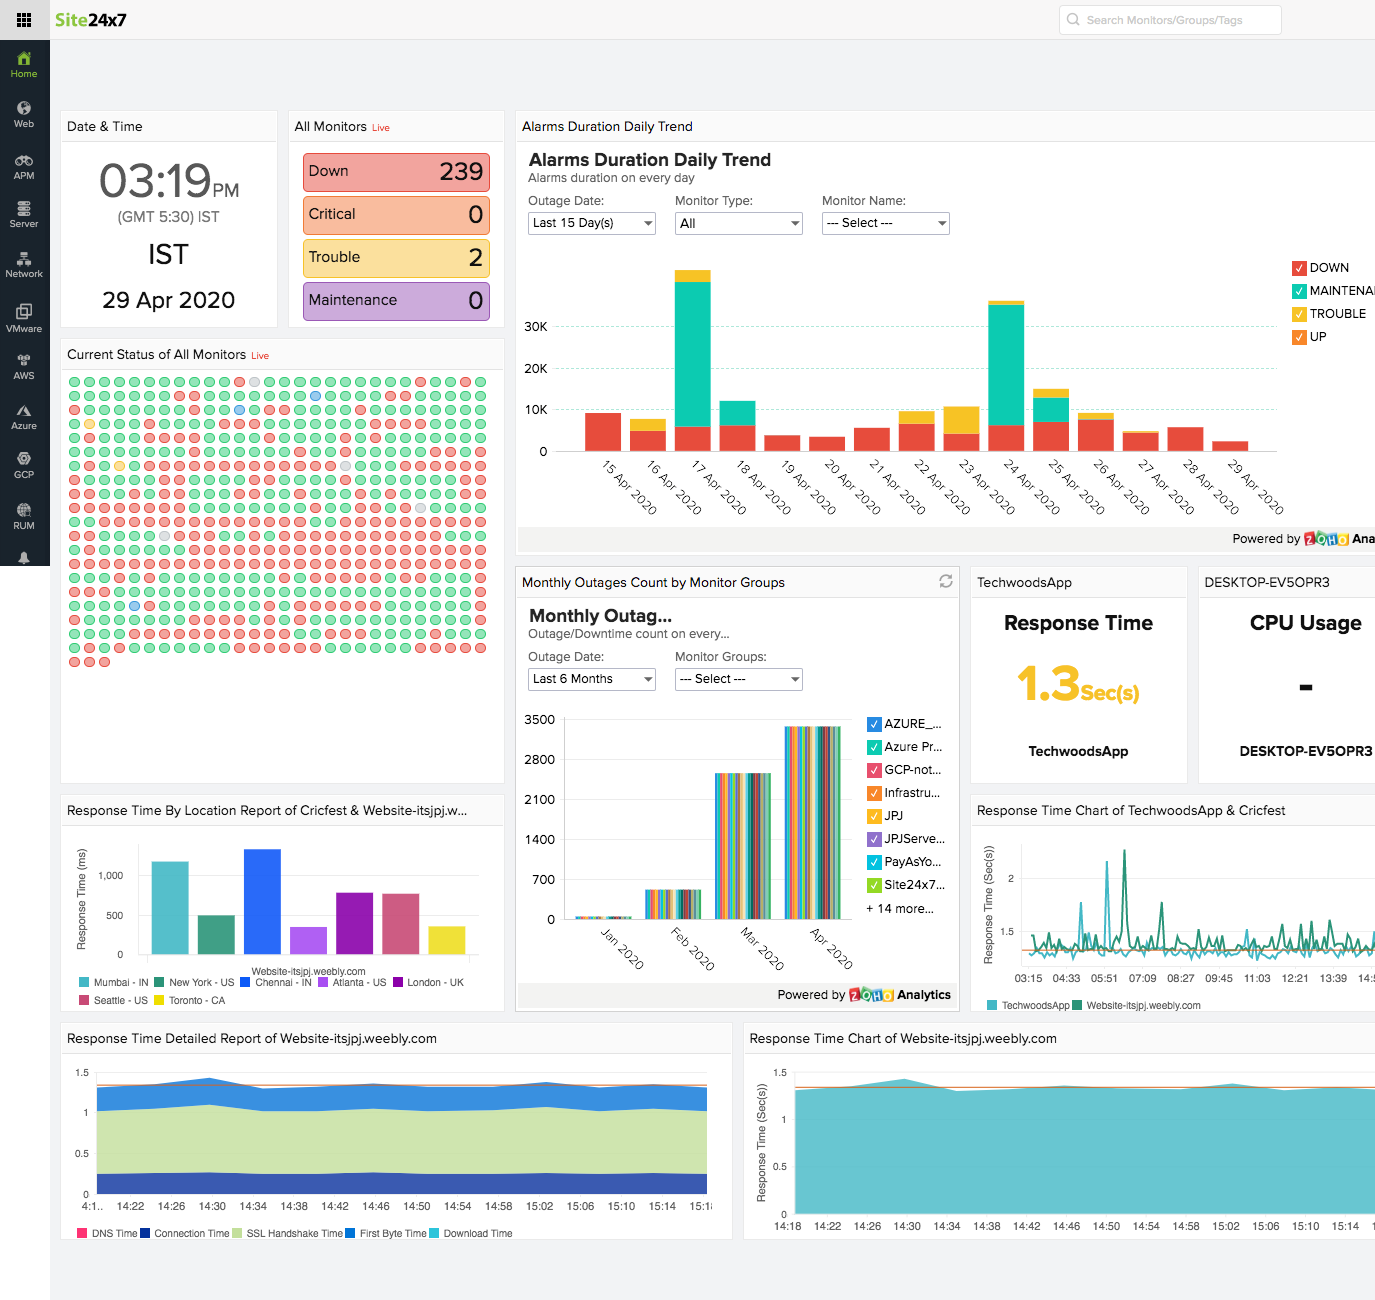
View the Advanced Analytics widget
To view the various dashboards which you have created in Advanced Analytics, you can navigate to Home > Dashboards. Towards the end of the page, you have the Advanced Analytics Dashboard. Click the dashboard of your choice to view it.
